Dies Irae By Notorious Ray. Download
Dies Irae or Pbrdm2 by Notorious Ray is a study in subtlety. The textures don't beat you over the head with their good looks. However upon a closer examination of them, one begins to realize how good they look and how well they fit together. This map reminds me of a $4000 suit. It is not going to attract a great deal of attention to itself. However the more one looks at its distinguising features, the more one begins to appreciate the craftsmanship that went into it. The suit will exhude style and quality in a subtle but noticable manner. Pbrdm2 is the $4000 dollar suit of maps.
The map can be divided into 3 parts, the left side with a YA, the right side with a GA, and the center with a RA. Both the left and right side are composed of a single atrium composed of two levels. The center is composed of 2 atriums of two levels each. There are 4 teleporters on the map. There are two teleporters on the left side of the map and two on the right side of the map. The teleporters will take you to the opposite side of the map and on the opposite floor as well. So taking the teleporter on the lower level of the right side of the map will take you to the upper teleporter of the right side of the map. The 3 areas of the map are connected mainly by narrow corridors. It is easy to keep people at bay by spamming the corridors. However someone can quickly back track and ambush you from behind by using the teleporters.
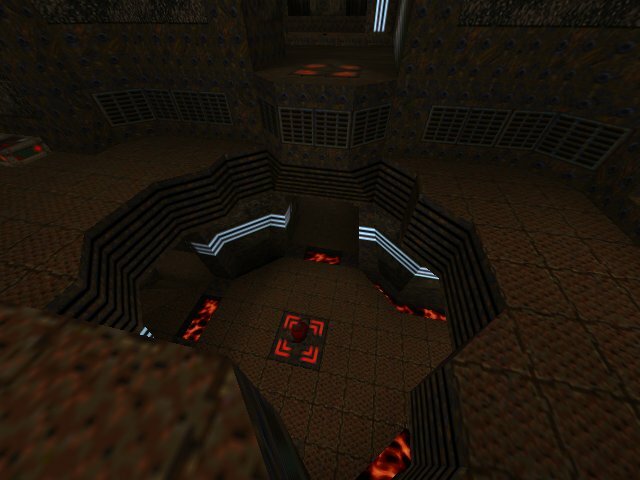
The center area is where lots of action will take place. The center area is composed of two atriums. In the front atrium at the bottom is a RA. This area is vulnerable on the bottom from both the right and left sides. You can also be attacked from the back. To make matters worse There are 4 places up above one could attack you from if you wait down below for the RA. The back atrium has a nice air-lift that throws you to the top level of the front atrium. There is a GL right above the RA. You could spam anyone waiting down below. The GL is really useful on this map because of the many narrow corridors connecting the 3 areas. If you take the air-lift up to the top level and turn around, a simple jump back over to the other side there is all it takes to grab a lightning gun for you to use as well. The narrowness of some parts of the map makes the GL and LG extremely useful weapons.
|
|
The RA is vulnerable from at least 7 directions of attack. Camping the RA is very dangerous indeed. |
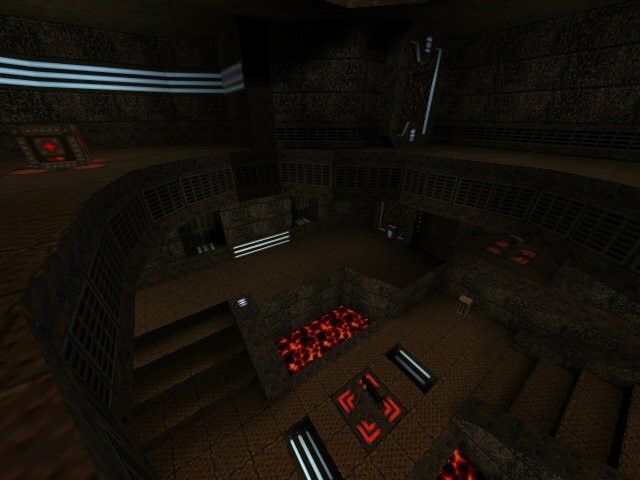
The left part of the map is a great place to stock up and prepare for an ambush on the RA. At the bottom there is a LG and RL. There is also a YA that is a simple jump away. Coming out of the lower teleporter there is an airlift that will take you right above the red armor. There is also an air-lift that will take you to the top of the YA area. Up top there is an isolated area where a MH is. The jump isn't hard to make but there is a ceiling fixture that provides excellent splash damage for anyone firing at it. This will make you miss the jump. It is impossible to rocket jump up to this level from the bottom. That is unless you rocket jump and use the ramps at the side of the steps to do so. On the bottom level there is some lava. Its not quite as deep as dm4, but its deep enough that you have to rocket jump out of it. It is also deep enough that you can discharge in it and kill anyone near you. This is a cheap kill, but it is a great way to take control away from a tanked up enemy.
| The jump to the megahealth can prove tricky in the heat of a battle. The lava is also very unforgiving. |
|
The right part of the map is somewhere that you want to avoid if at all possible. Here there is only a GA at the base of an air-lift and a RL. There are the two teles to the YA part of the map. There is also lava at the bottom that will trap and kill you or help you deep fry the enemy while self-destructing. This is a place that one does not want to defend. This is however a good place to try to get the enemy to chase you. If you wait up top and the enemies attacks from the bottom it is very easy to knock them into the lava. You might also be able to trick the enemy into playing teleporter tag and then sneak away and steal the RA in the middle.
Final Verdict.
This map looks incredible. The textures work well together. Even the lava fits well with the other textures. There are tons of small details on the walls, floors, and ceilings. The item placement is well thought out and this map will produce some extremely fast gameplay. Everything is well spaced out so a dmm1 duel is possible. There is also a quad for those fans of dueling with even more lethal weapons. I said at the start that this map is the $4000 suit of maps. It has style and is full of subtle details. If Billy Crystal were reviewing maps at 3ac he would simply say, " YOU LOOK MARVELOUS ".
Download